Monthly Archives: May 2013

2D Representation Of 3D Objects

The Overview

I implemented this MARS lesson on 2D representation of 3D objects because I felt like I had not done a good job on covering the topic in the past – plus I thought that the way they teach it using vessels of water would be a natural segway to volume, which was the next topic I was to cover.  Overall I very pleased with student engagement during the lesson and I felt like they came away with a deeper understanding and appreciation for the different surfaces of a 3D object.

Screen shot 2013-05-30 at 5.23.50 PM

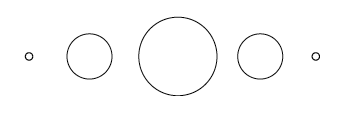
The basic idea is that students are to sketch what the surface water looks like in a vessel as the vessel fills (or empties) with water.  An example of that is pictured above where students were suppose to draw the surface water as the water filled up the cylinder.  The second part of the lesson is a matching activity, matching the water vessel with the surface water pattern.  They then make a poster that highlights and defends the decisions they make.  Then a member of each group goes to another group to compare solutions.  Lastly, there is a worksheet that is very similar to the opener that each student completes individually.  That worksheet serves as a nice post assessment for the lesson to see how much the students have learned.

The Advice

– Having models of the shapes for students to look at is extremely helpful.  The effectiveness of this lesson would have been decreased significantly if I had not had models.  I wish I had more – I was basically running around to students who were struggling and giving them the model (yup, only 1 per shape).

–  It helped me describe to the students that a sphere is composed of an infinite amount of circles, the biggest of which is called the great circle and has the radius of the sphere.  The sphere is the first vessel of water that the students work with.

Screen shot 2013-05-30 at 5.28.22 PM

Screen shot 2013-05-30 at 5.28.02 PM

– Expect students to not initially see that as the sphere empties, the surface water starts small, expands, and then ends small again.

– Next year I will not have each pair split up after they create their poster.  Rather I will combine two groups of two into a group of 4.  At that point I will have that group come to a final conclusion as to what they are matching.  I didn’t think the students did any signficant error correcting when the original group of two split up.

The Goods

– It’s all here.  I created no new worksheets for this one.  The only extra material required is stuff for the posters.

So I Guess I’m Making Videos Now

I had to be absent a couple days last week, and I wanted to the class to learn some new material.  We had just spent two days simplifiying radicals, and I wanted them to move onto adding and subtracting.  So I decided to make a quick video of myself explaining how to do it.

[youtube http://www.youtube.com/watch?v=AQ6j4ZrMMBY]

The next day basically every single student I have told me how much they loved the video.  The sub-report talked about how great it was.  A couple teachers and a teachers aid all told me at various times throughout the day that they heard I made some great video.  Then yesterday a student told me that she learns better from my videos than she does from me (thanks…  I think?).   And after multiple students asked if the video was online, I figured I should put it online.

And it’s kind of funny because they are nothing special at all – straight up direct instruction.  But it seems like some students got something out of them, so who I am to judge?  And just like Khan I suppose, I did them in one take so they are not time consuming to create.  I ended up making 1 for geometry, and 2 for algebra.

Oh yeah, and I am certainly not going to post them all to this blog.

Never Again

Around the end of the year I like to look at my class and remind myself that in a couple weeks the course will be over.  And after that, those 30 students and I will never again be in the same room together.  For all eternity there will never be another moment when a room will have this exact collection of souls.  I think about how our lives have intersected –  and it amazes me that for 1 hour a day, 180 days, we lived together within these walls.  And the fact that it will never be again makes me cherish each remaining moment.  Makes me cherish every time that magical bell rings and those 30 young people walk into room A3.

It is a simple thought but it keeps me excited to go to work, and keeps me insulated from feeling overly exhausted or too impatient for it all to be over.

Teaching Mixture Problems With The Mixture Picture

I just want to throw my hat into the mix and say that I also have found Marlo Warburton’s “Mixture Picture” to be an extremely effective way of teaching mixture problems.  I mean you get to do a demonstration in an algebra class!  Just that alone makes it awesome, not to mention students like it and find it helpful.  So what is it? (You haven’t seen the video?  You are soo uncool)  The “Mixture Picture” is a graphical organizer that helps students make sense of mixture problems.  The above link directs you to the Teaching Channel that has a video of her giving the lesson, as well as handouts.

Screen shot 2013-05-12 at 5.14.43 PM

I have never had much success with mixture problems, so I was happy to try anything different.  I could not have been happier with the results – the entire class was engaged.  After the first example, a majority of the class was up and running on it.  I am not going into the details of it because it is all in the video, which I followed very closely.  I’ll just move into some advice I have gained from the experience.

MixturePictureWhiteBoard

The Advice

1.  If you are going to use the worksheets from the Teaching Channel, then I would start with the worksheet “Homework Sheet for Day 1 of Mixture Problems” because problem #2 of the worksheet “8th Grade Mixture Problems” is too different from problem #1.

2.  Don’t give your students anything in Comic Sans – so retype the worksheet “Homework Sheet for Day 1 of Mixture Problems” with a different font.

3.  Do the demonstration.  I brought in some red food coloring and continued to go back to that demonstration throughout the class.  Check the video for how to do the demonstration.

MixturePictureDemo

4.  My students quickly grasped how to do it when there were three percentages given – but when only two percentages are given, the students initially struggle.  That’s why I brough the container of food coloring to class with me.  Because food coloring is a 100% food coloring!  That helped them know when to use 100%.

5.  The Seesaw example that Marlo does on the whiteboard is critical to show the students.   I would continue to go back to it every time the students were working on a mixture problem.

The Goods

All the handouts are on the Teaching Channel website.  But remember the Mixture Picture is a method – not a worksheet, so you can just use the mixture problems in your textbook.