Category Archives: #kinesthetic

Monomial Partners

“What’s your name, what’s your monomial?”

This is a great activity that was inspired by Matt Vaudrey’s Equation Speed Dating.  In this lesson each student gets to create their own monomial – which I constrained to having to be even and with a variable.  Then they break up their paper into three columns:  Partner / Our Binomial / Our Rectangle.  The students pick a partner and join each others monomials together to create “Our Binomial”.  Then they factor their binomial and represent it as a rectangle by labeling it’s dimensions and indicating the area.  I circulate the room and once it appears every group is finished, I have everyone get up and find a new partner.  I’m demanding here that all students get up out of their seats and move somewhere new.

IMG_1868

After a couple rounds I started having them draw their monomial and their partners monomial as separate rectangles, and then draw them together.

I have been focusing on a geometric approach to factoring, so the rectangle column was a great addition to previous times when I have done this activity but only asked for the solution.

The column “Our Binomial” does a nice job reinforcing that a binomial is the combination of two monomials.

The Advice

Don’t require them to say “what’s your monomial?”, “do you agree that our binomials is….  “, but inspire them to say it by modeling it.  A lot of my students were saying it because I was giving them messages that anytime they get the chance to say “monomial” or “binomial” they need to take it.

Tell the students not to move onto a new partner when they are finished.  They need to wait until you tell them to switch partners.

Remind them that you are really counting on the partners to catch any errors! Because you can’t do the problems on the board since every pair is working a different problem.  “And yes, you are the partner I am counting on for someone else.”

“What’s your name, what’s your monomial?”   No that’s not a pickup line for Speed Dating…  or is it?

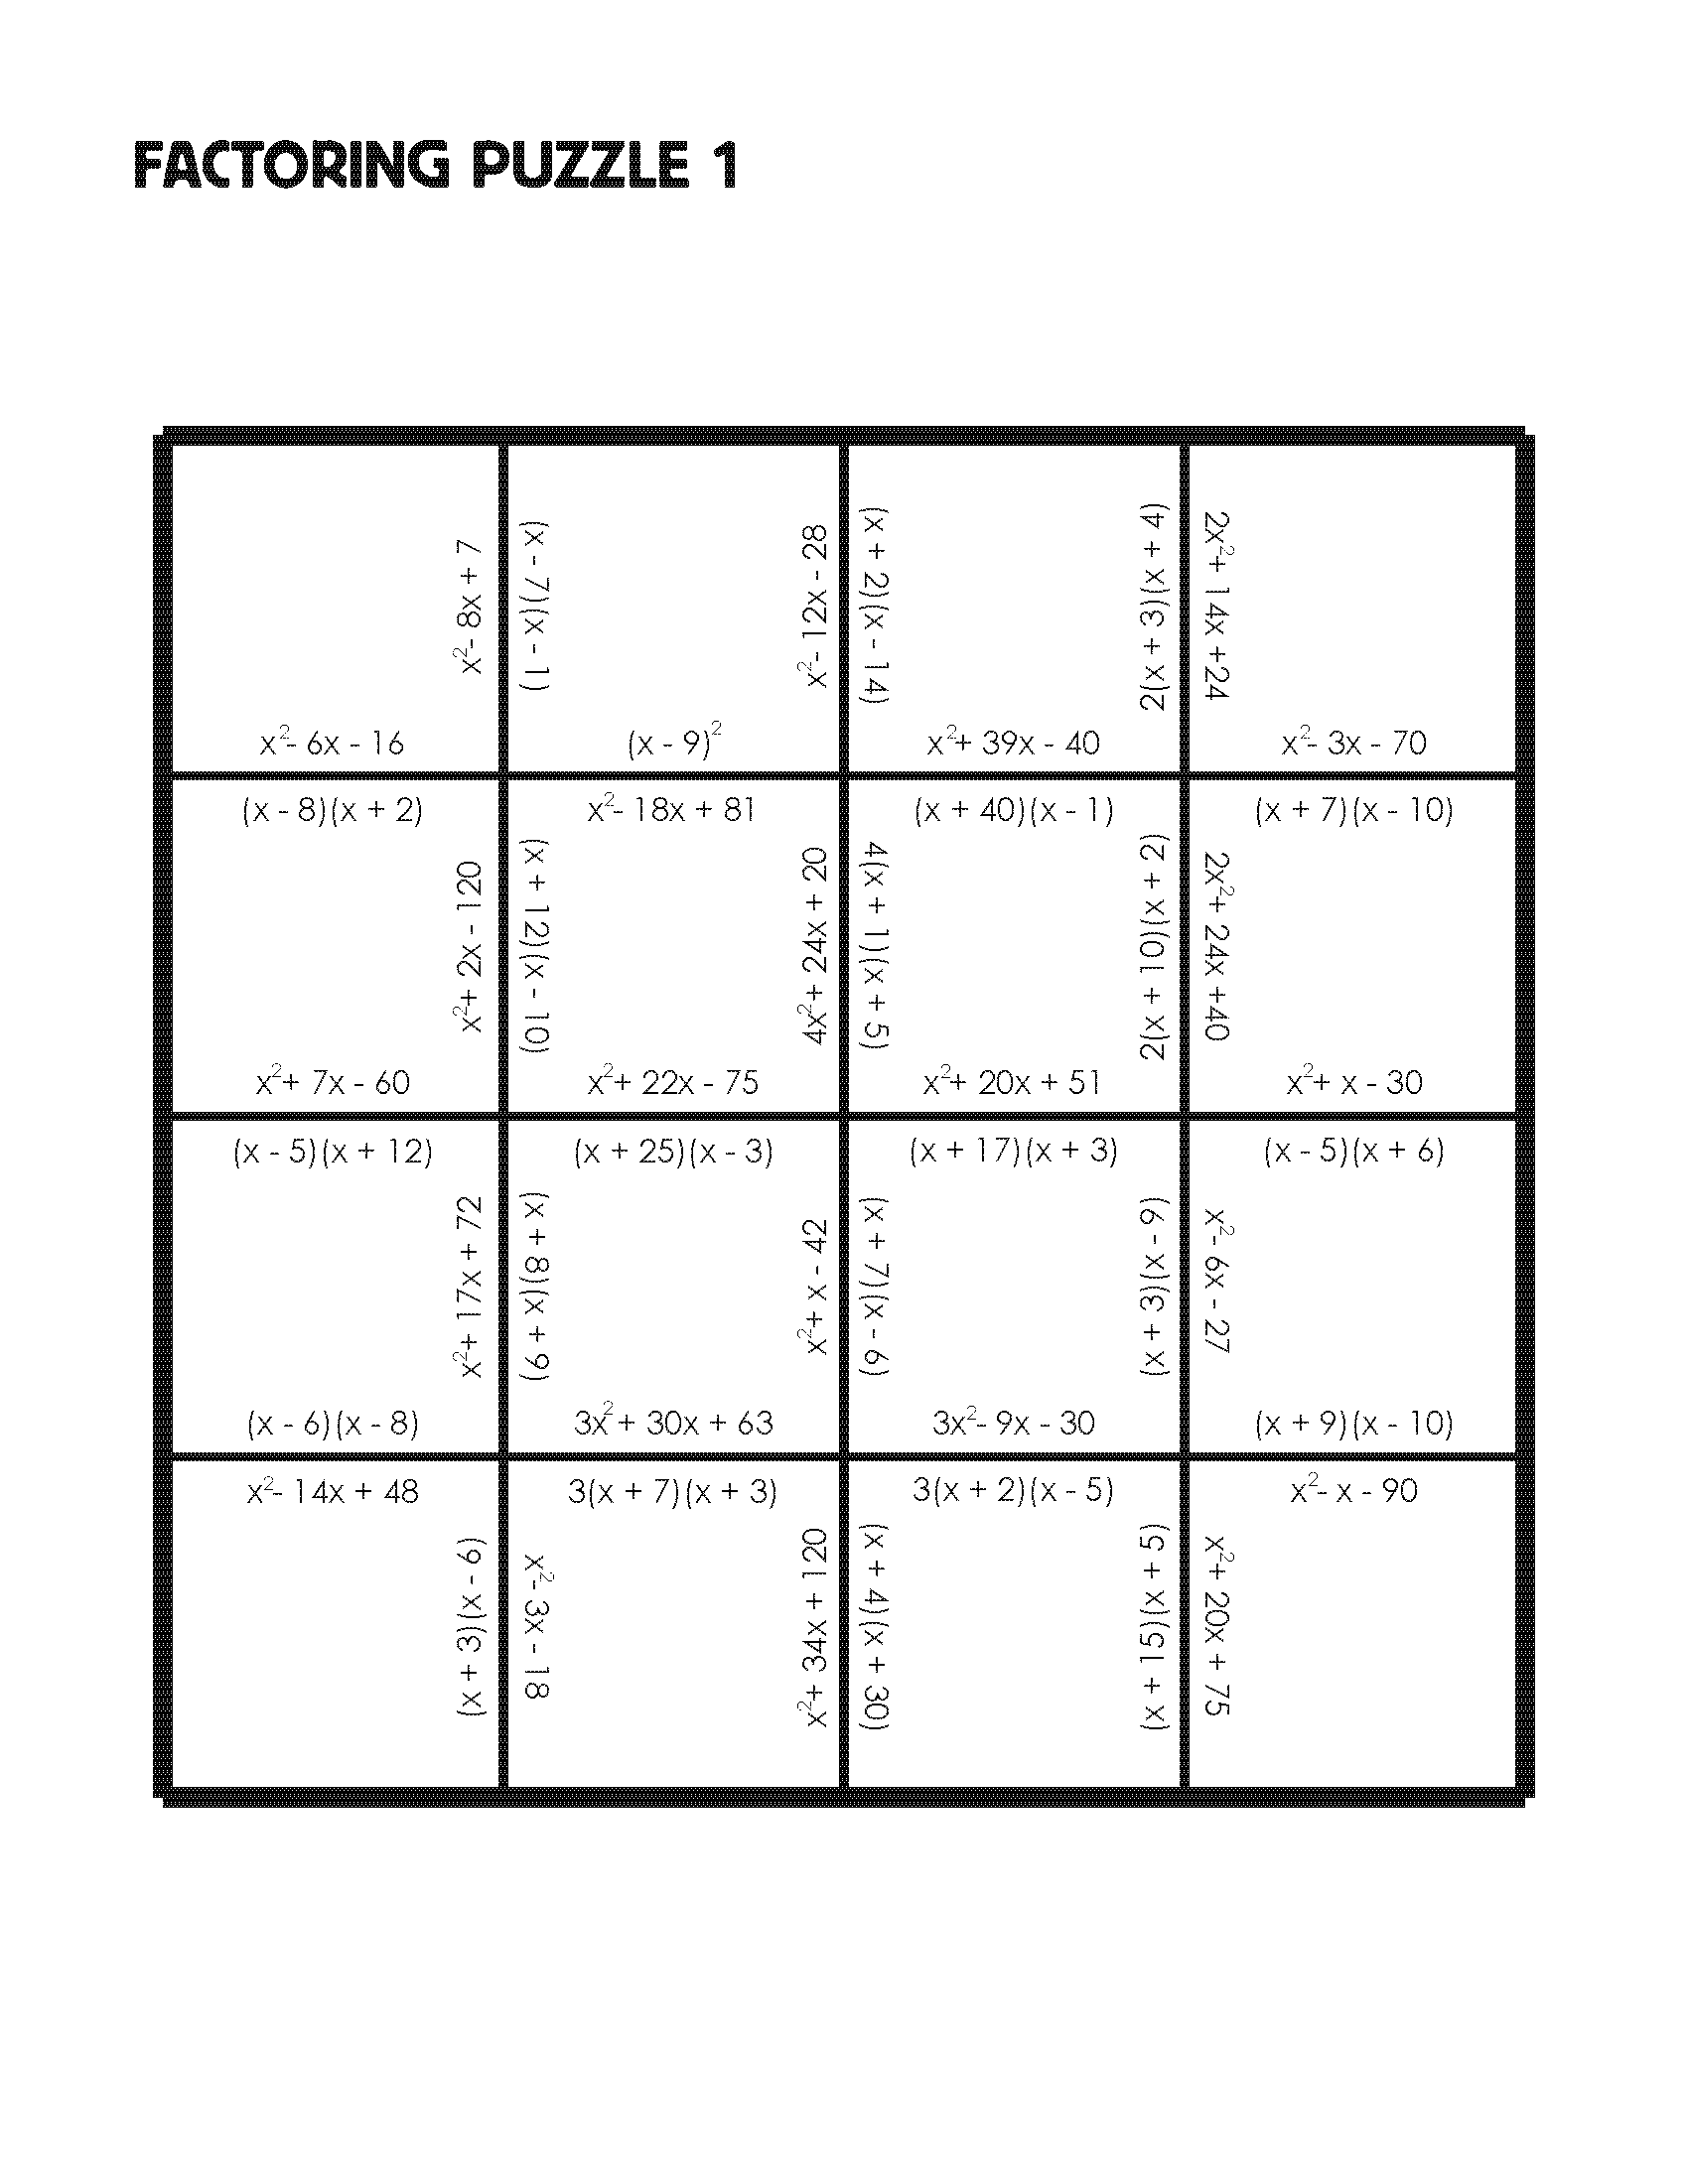
Factoring Puzzle – Practice Version

The Overview:

I wrote about a factoring puzzle I found online here.  That puzzle is difficult because it has trinomials with a leading coefficients other than 1, as well as special products.  I wanted to create a puzzle that would be a simple review on factoring trinomials where the leading coefficient is always 1, or could be 1 if the GCF is factored out first.  Thus when they eventually challenge the more difficult puzzle, their questions will be focused on factoring, rather that “I don’t get what to do?”.

I did not create a scrambled version, so obviously you will need have a TA cut out the pieces and put them into envelopes.

FactorPuzzlePractice

FactorPuzzleChallenge

The Goods:

FactorPuzzlePractice

FactorPuzzleChallenge

Update 1:

Thanks to a great comment from John, I have created one that does not have a border, thus allowing us to differentiate for the excelling students.  That puzzle is now included above in the original post.  The puzzle without the border is the exact same on the inside as the puzzle with the border, I will eventually make that different too when I get some time.

Solve / Crumble / Toss

A colleague of mine told me about this activity, and it has been a lot of fun for the class.

The Description

The basics are that the students are in pairs and do one problem on a whiteboard.  I check all their answers.  Then they crumble that problem up and throw it across the room. When I say stop, they all stop throwing, and pick up a new problem.  They uncrumble their new problem, do it on the whiteboard, and the process starts over again.

Each problem has a number, and it’s important that each group puts the number of the problem on the whiteboard, so I can know which problem they did when they hold up their whiteboards.  I have the answer key in front of me so I can quickly check if they are right or wrong.

I generally use about 8 different problems.  There is a chance that students will pick up a problem they have already done, so if that happens, I just tell them to pick up a new one.  At the end of the activity I like to give them a worksheet that has all of the problems from the activity on it.

I use colored paper to make sure that only the problems are getting thrown.  I use two colors, and make one color for easier problems, and the other color for more challenging problems.

The Advice

– I let the student throw paper back and forth, which gets hectic, but they love it.  If you want a more controlled scenario, only allow them one throw.

– Make it clear – they must stop throwing exactly when you say “Stop”, and cannot throw until you say “Throw”.

– Use colored paper, and make sure no white paper is thrown.

– A full sheet of paper can be thrown to hard, so be sure to use a half sheet for each problem.  Some students may try to crumble a couple of problems together to make a larger ball – big time no no.

– I arrange the desks so that half of the class is facing the other half of the class.  Let the students know the back row is the safest place.

– The problems can be hard to read when crumbled a lot, so use a large font.

The Goods

Here is the one I did for a review on Inequalities in algebra 1.

InequalitiesCrumbleToss

InequalitiesCrumbleTossWS

The Update 1

– Yesterday (at the advice of a colleague) at the end of class I stood in front of the recycle bin and told the students to all throw their papers at me.  It has two great benefits:  The students love it.  It makes cleanup easier because all the paper ends up in the same general area.

– I like to handout fresh problems (meaning problems on paper that has not been crumbled) for the first round of each class because the problems get harder to read the more the paper is crumbled.  It also allows me to intentally differentiate by ensuring that high achieving students get the more difficult problems.

Jungle Hideout

The Description:

The Jungle Hideout activity is something I got from Dan Meyer.  He has several in the handouts of his geometry and algebra curriculum, and his blog post about them can be seen here.

You put up 8 to 10 hideouts around room.  Each hideout has one problem on it, with multiple choice answers.  Each answer directs students to a different hideout.  The point of the activity is to find the Jungle Hideout.  Now if they answer every question correctly, they will be sent to every hideout except one.  And the one they are never sent to is the Jungle Hideout.  That is what the students are looking for.

Creating these is easy.  Just pick any order that you want – say for instance you choose 2 – 3 – 8 – 4 – 1 – 7 – 5.  So your hideout is 6.  Once you have your order, you just need 8 mulitple choice problems, and make sure that the right answers go in the correct order.  After that just send the wrong answers anywhere.

A way to differentiate for the advanced students, is to have them be in charge of one of the hideouts when they finish.  When they are in charge of a hideout, they have to answer all the questions of the students at the hideout.  I give the students 2 pts. extra credit for taking over one of the hideouts.

The Advice:

– Never tell students the Hideout without them telling you their order.  Students will come up to me and say “The hideout is 6”.  And I will always respond “What’s your order?”.  This allows me to make sure that they did not just guess, that they actually did the problems.

– I intentionally put more difficult problems by the whiteboards, so I can use those to help explain them.

The Goods:

I have created lots of these, they are listed below by topic (at least they will be when I get more storage space).  Many of the individual problems were taken from Hideouts created by Dan Meyer.

Parallel and Perpendicular Lines

Polygons and Quadrilaterals

Solving Equations

Factoring Puzzle

The Description:

The original puzzle can be found here.

The only thing I changed was that I added a border around the outside of the puzzle.

The puzzle above is in the correct order.  Obviously if you are going to have students cut out the pieces, then you have to scramble the order.  I have already done that, and both versions are in The Goods.  Here is what the scrambled version looks like:

I think the puzzle is too difficult if there is no border.  This is because the students might factor an expression, and then not find the answer in the puzzle.  The problem is that this might lead them to believe they have factored it incorrectly.  I believe putting the border around the outside shortens the activity to a better length, and makes for a better overall experience.

The Advice:

– I recommend using having your T.A. cutout the puzzle pieces from the finished puzzle, and then putting the pieces into separate envelops.  I used the scrambled version of the puzzle and had the students cutout the pieces, and I think too much time was wasted cutting out paper, rather that solving the puzzle.

– I recommend first having all the students find the puzzle piece that has the expressions x^2+5x-6 (it’s the top right piece).  Have them glue it on the top right corner of the answer document (under the heading “My Factoring Puzzle’).  Then have them factor it on the answer document (or separate sheet), and you do that problem on the board.  Next have them search for the answer piece (x+6)(x-1) and glue that piece in the proper place.  I would be doing this along with them on the document camera.  Then do another problem  off of one of the pieces they have glued down, so that when you finallly let them work alone, they already have three pieces glued to their paper.

– The above piece of advice is key, because I originally just told them what to do and let them do it, and I got a lot of students saying “I don’t know what to do”.

The Goods:

FactoringPuzzleWithBorder

Macro-Differentiation

These are a listing of hastags that I use to catagorize my lessons plans.  Each catagory represents a different style lesson plan.  My instructional goal is typically to make sure that I use each hashtag at least once a month.  The goal of this blog is to share all the lesson plans that I use under each hashtag.

My detailed lesson plans are my Keynote slides.  But along with those, I make a quick, calendar-style overview to me a general idea of what I am doing.  It’s on this calender where I place the hashtags at the bottom of each day.  This allows me  to quickly look back at what I have been doing, and know whether of not I am differentiating.  For example, here is two weeks worth of my lesson plans in geometry.  Notice that I can quickly see whether or not I have differentiated my instruction, without having to analyze each specific lesson plan.  The hashtags allow me to get a quick sense of what I have been doing, and what I have not been doing.


*Notes –

-The term “perplexity” is being used as described by Dan Meyer here