
I love this lesson for a variety of reasons – one being that they initially scale down a rectangle, and then they scale up a design and watch it fit perfectly into their original rectangle. Scaling down and up, woohoo!!!
The abstract would call this a four step process:
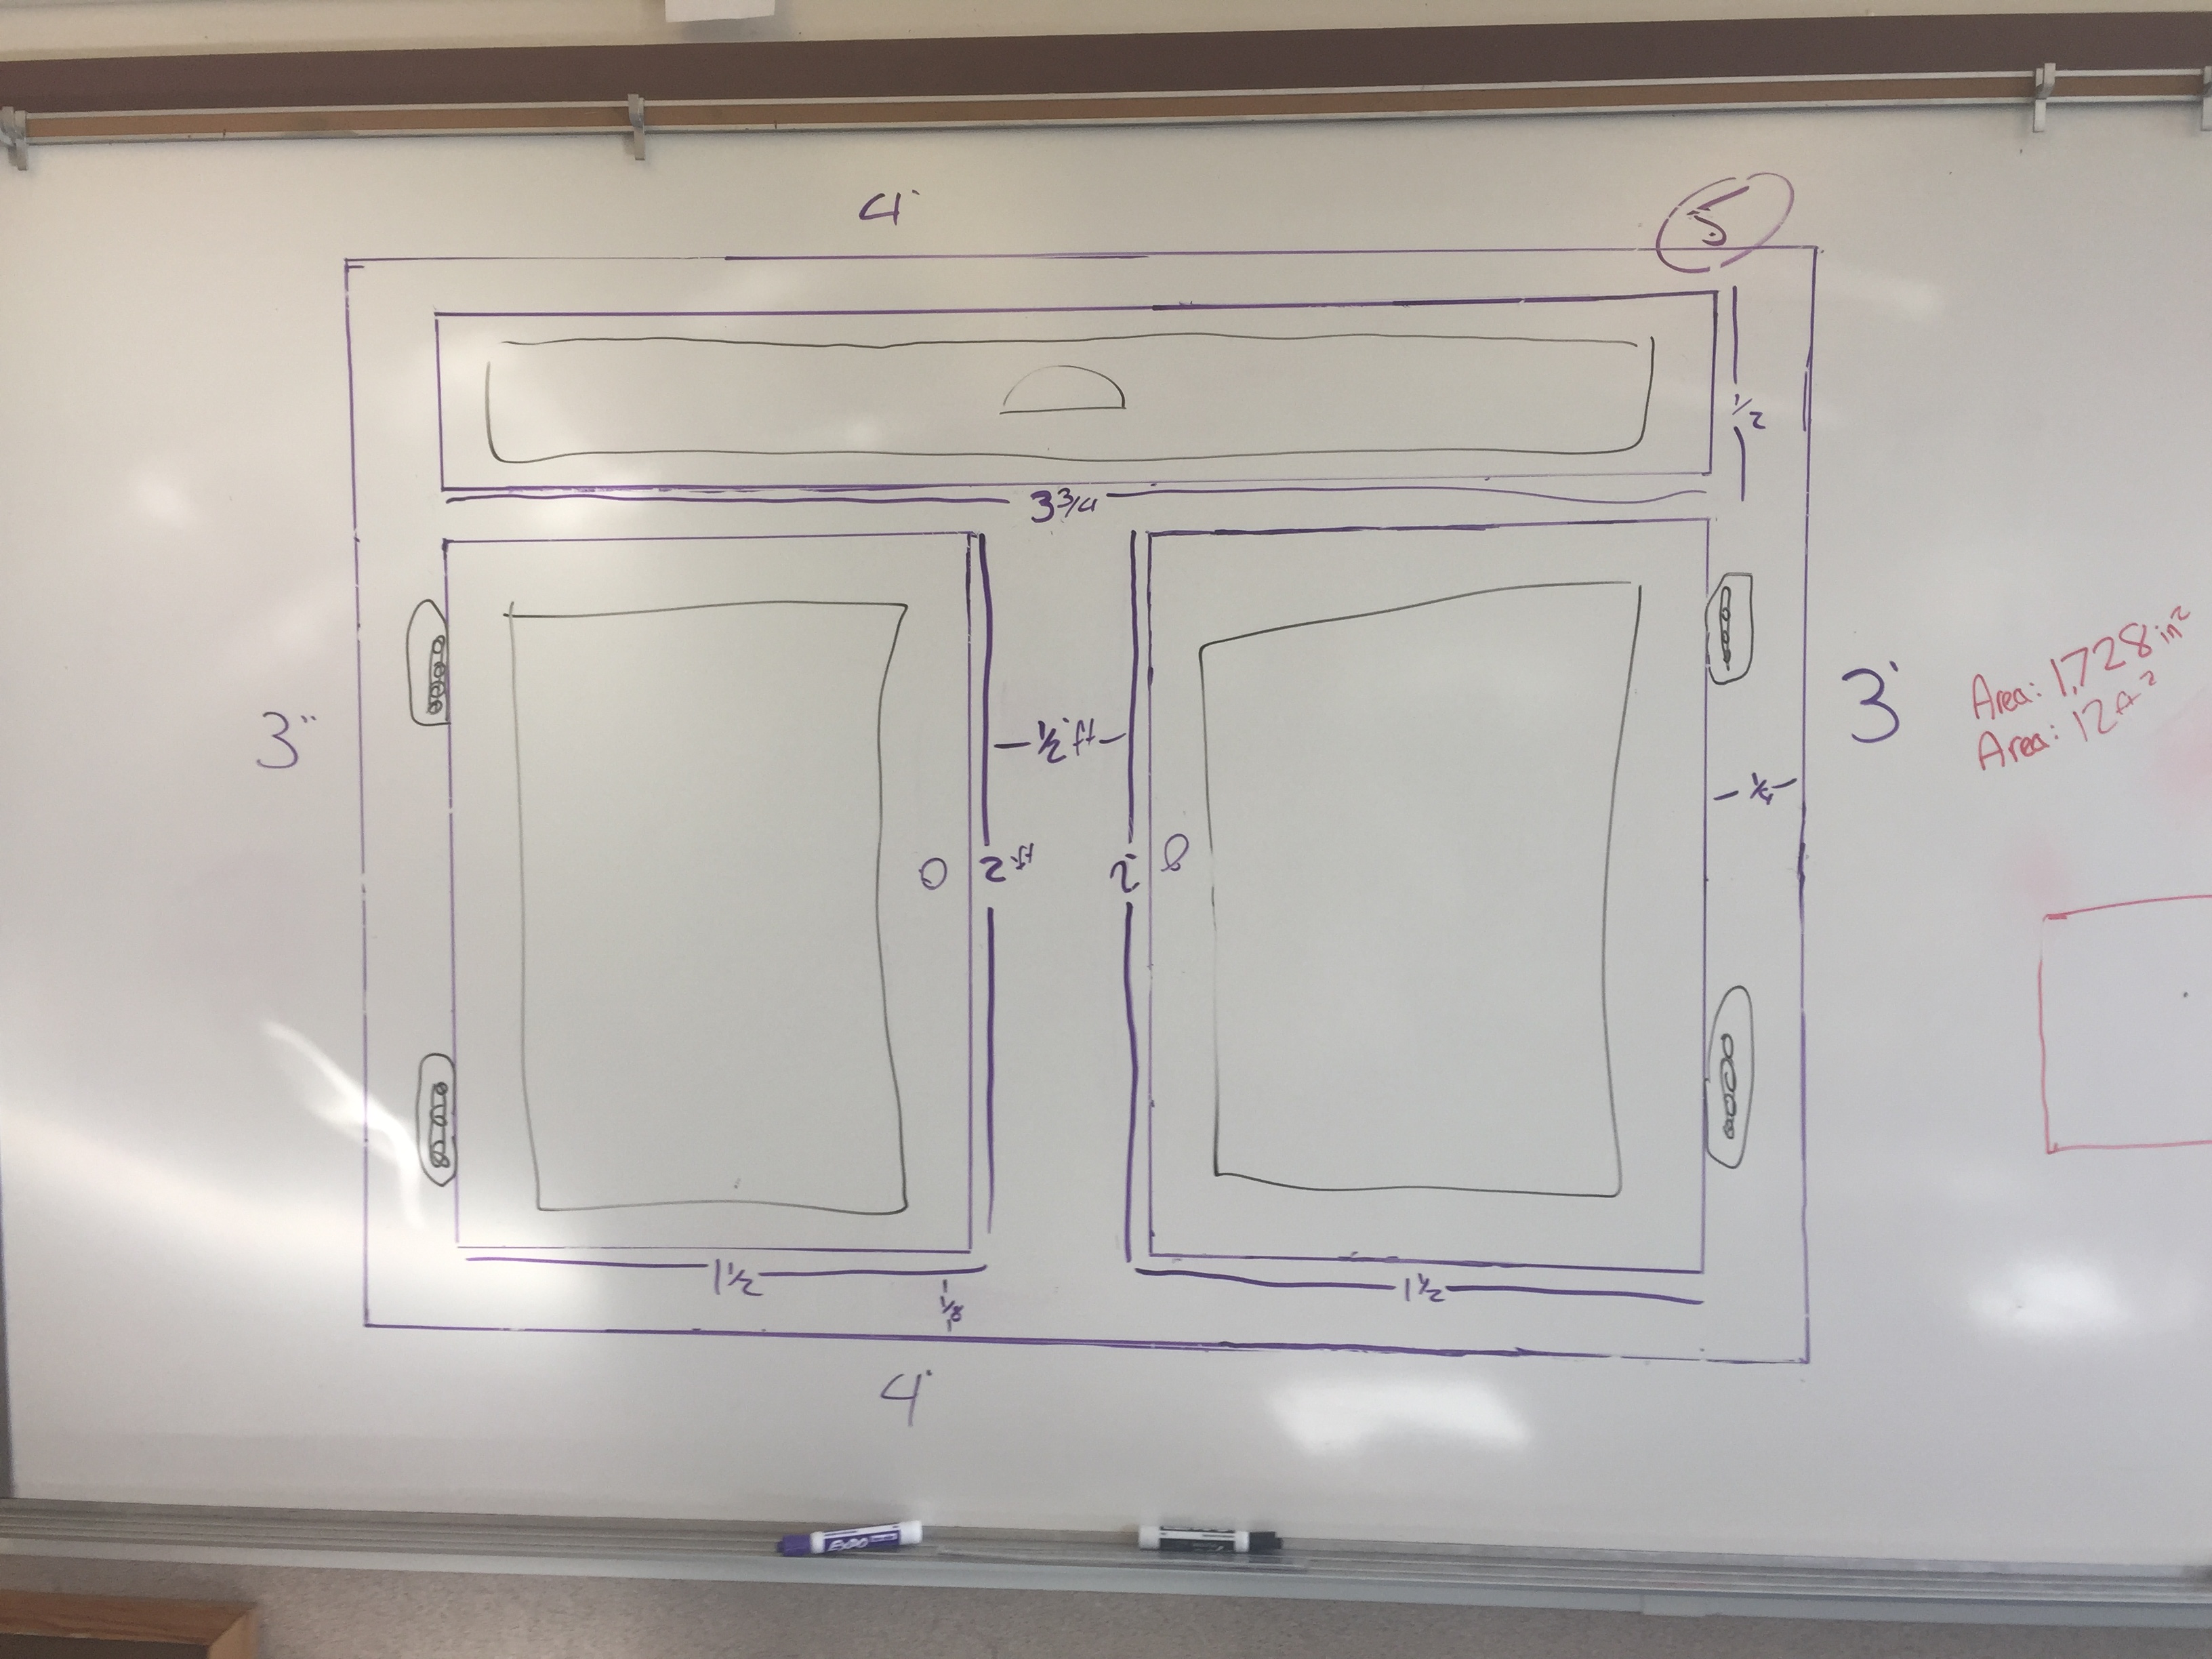
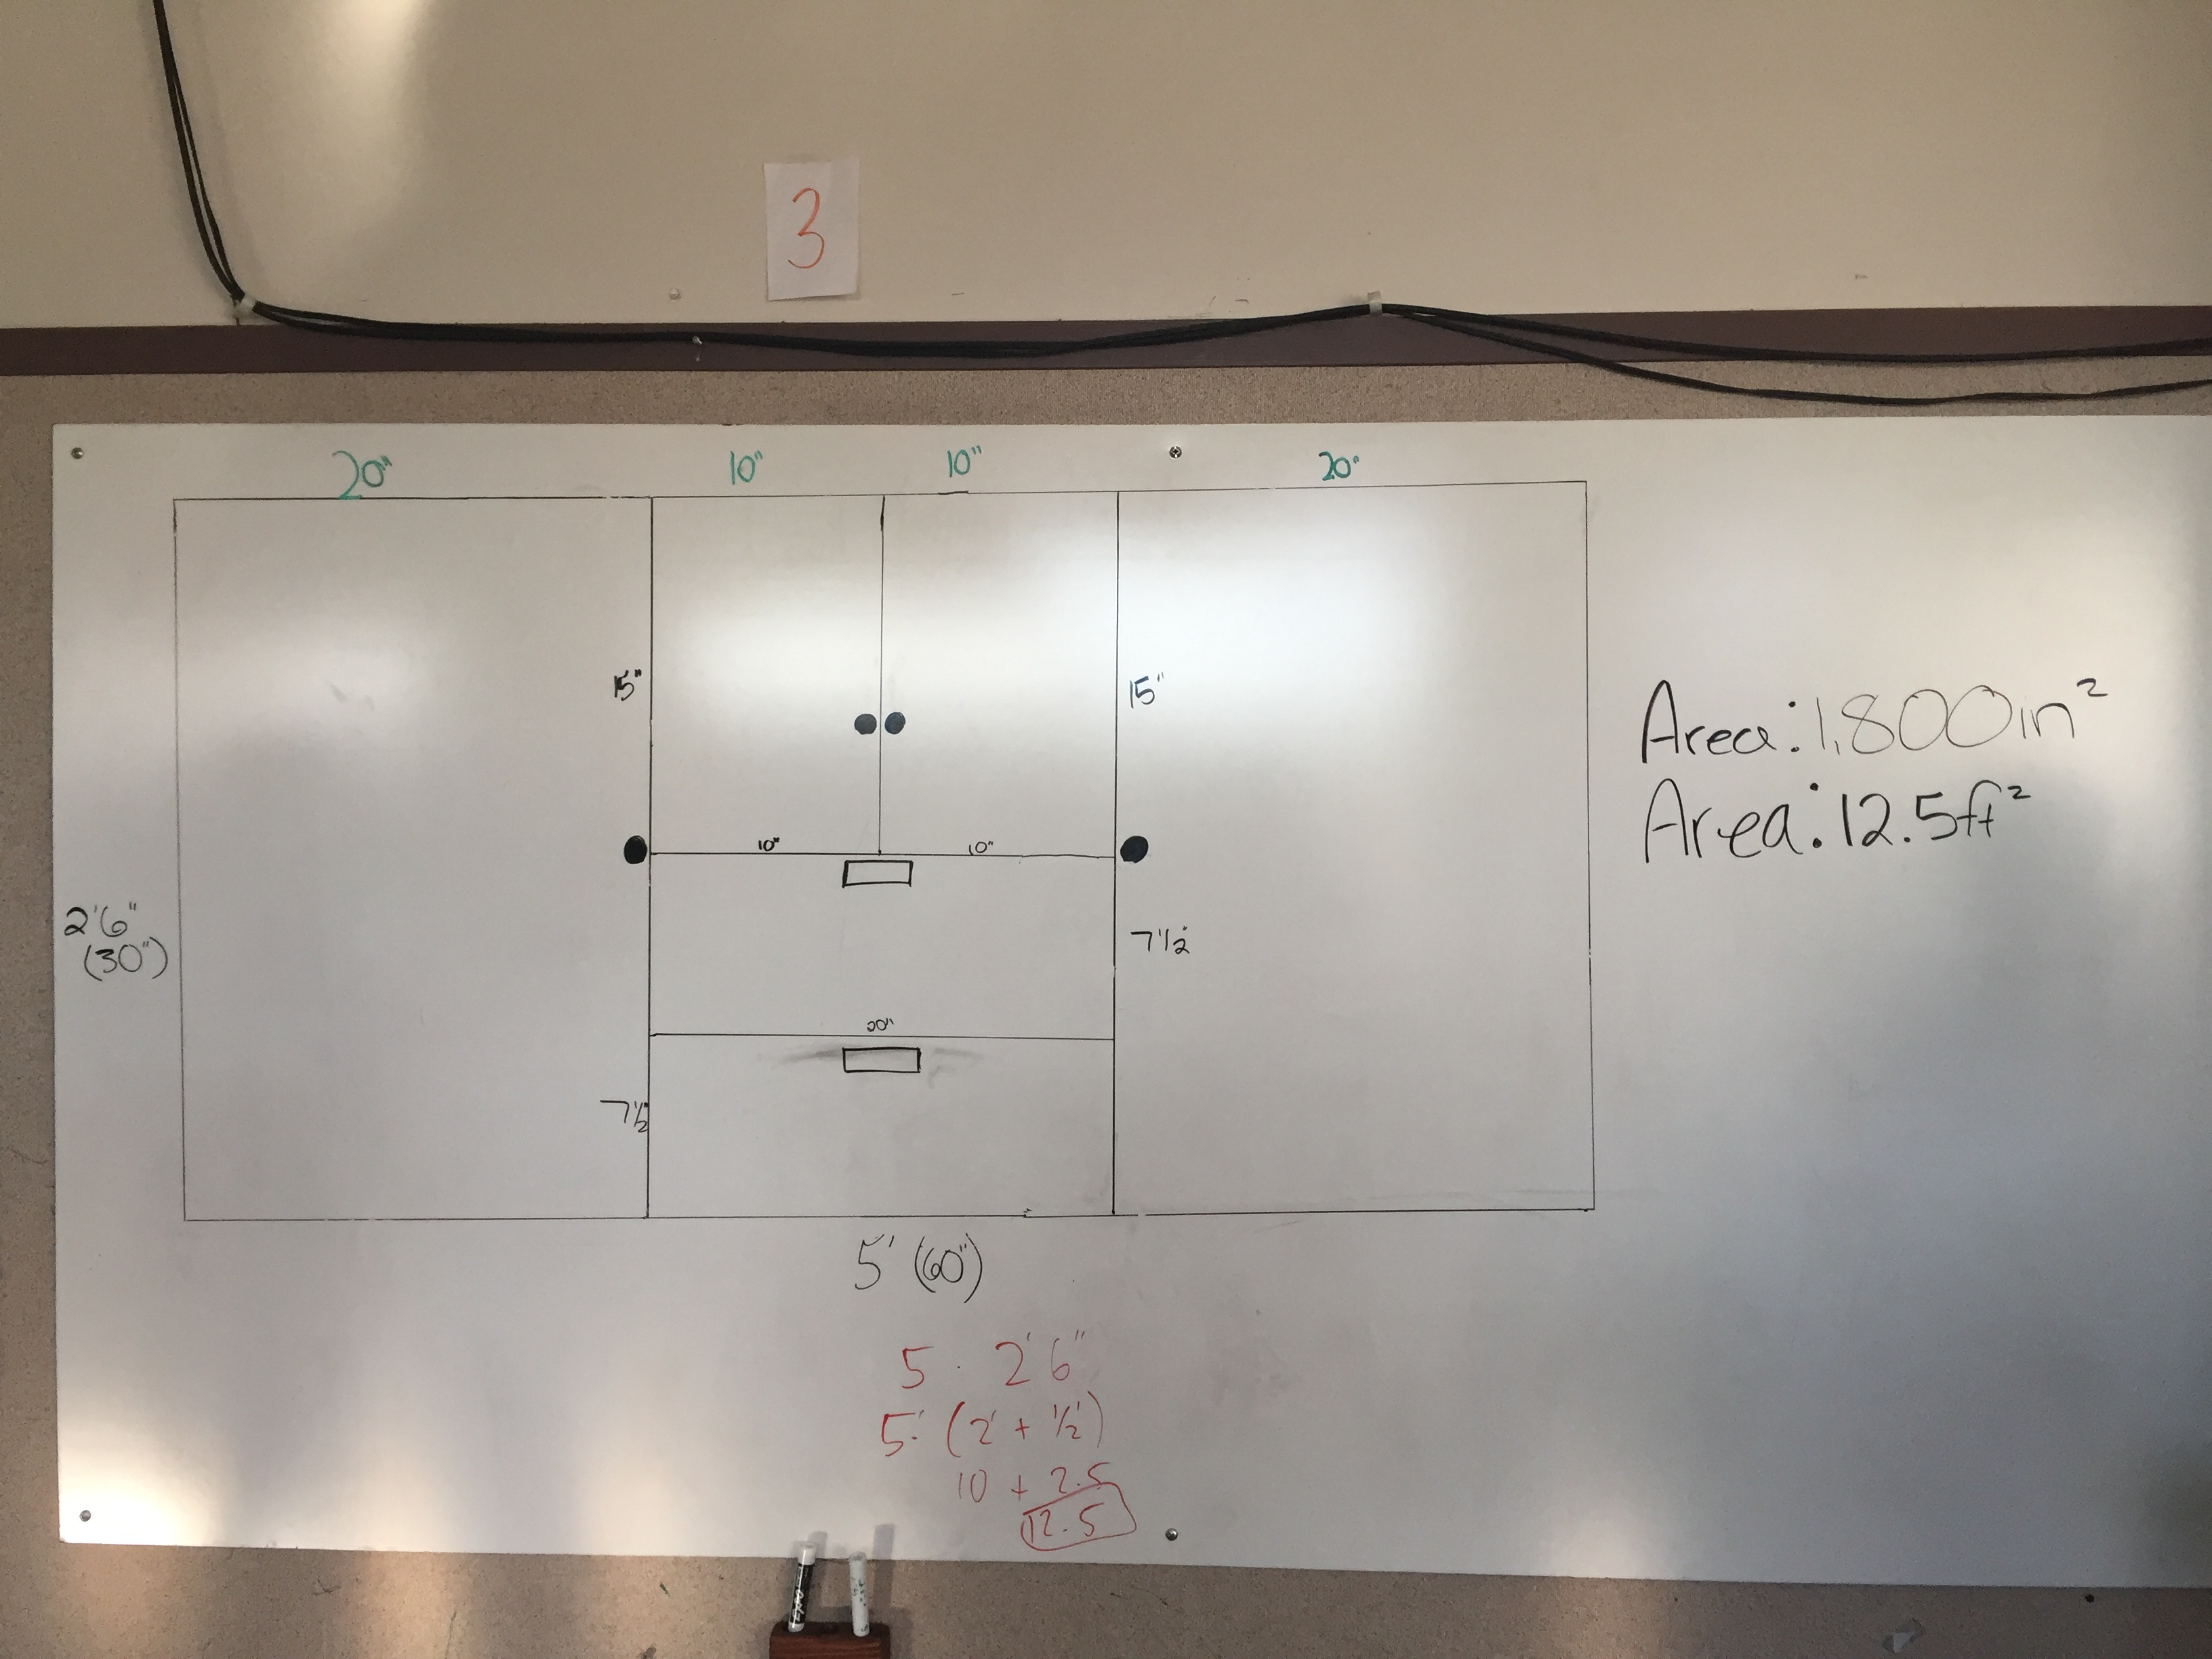
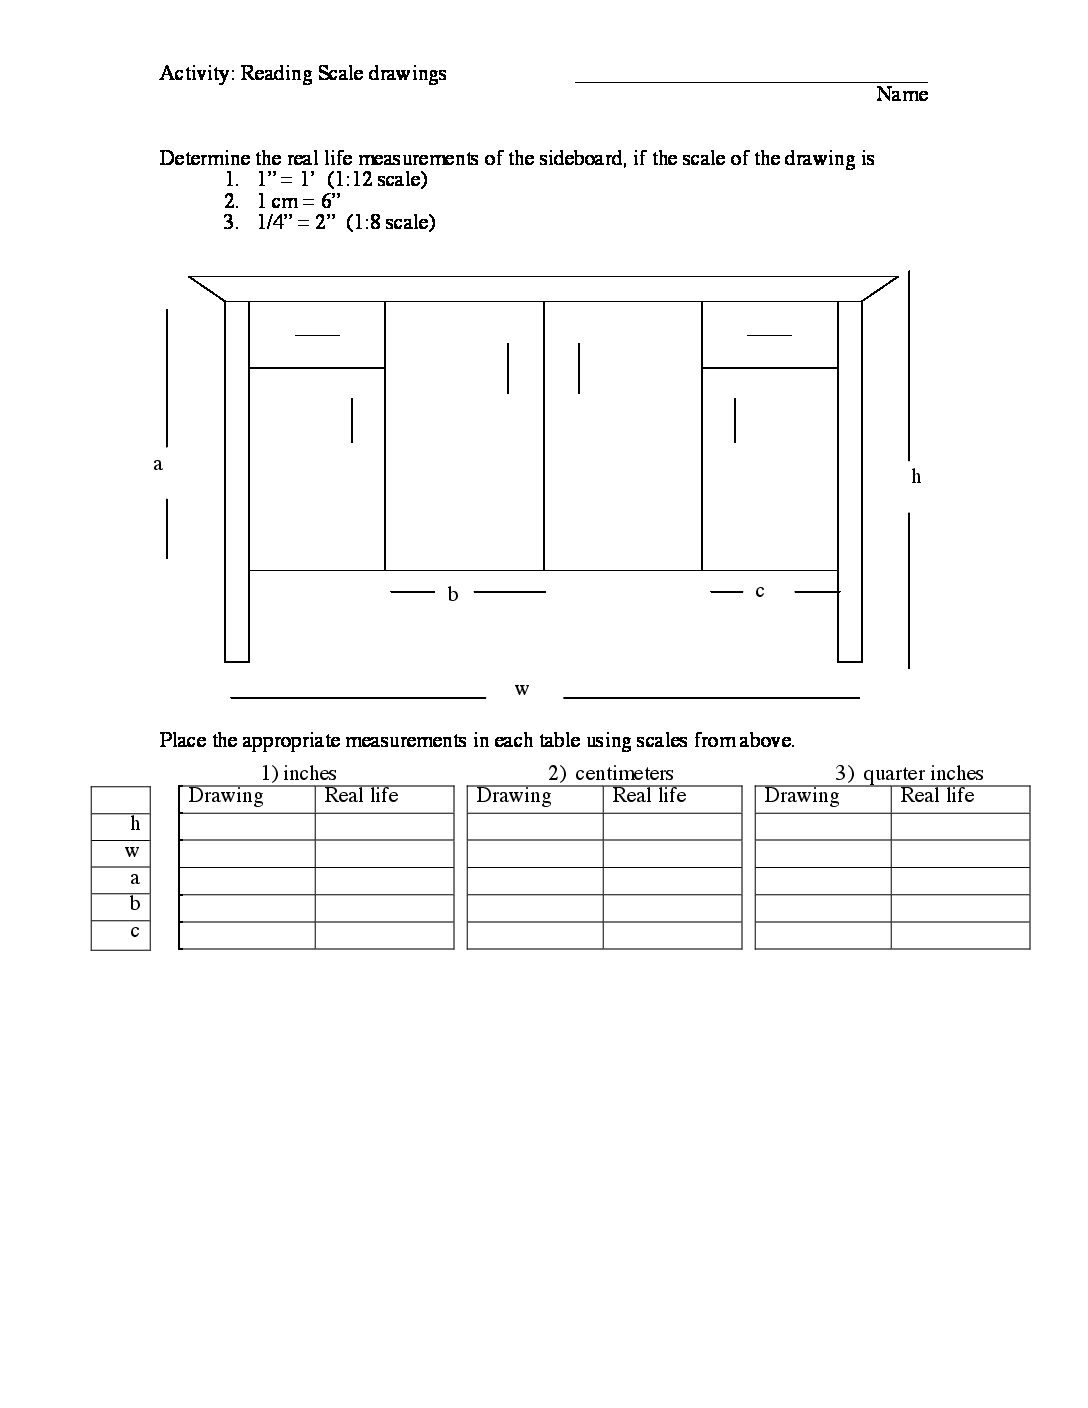
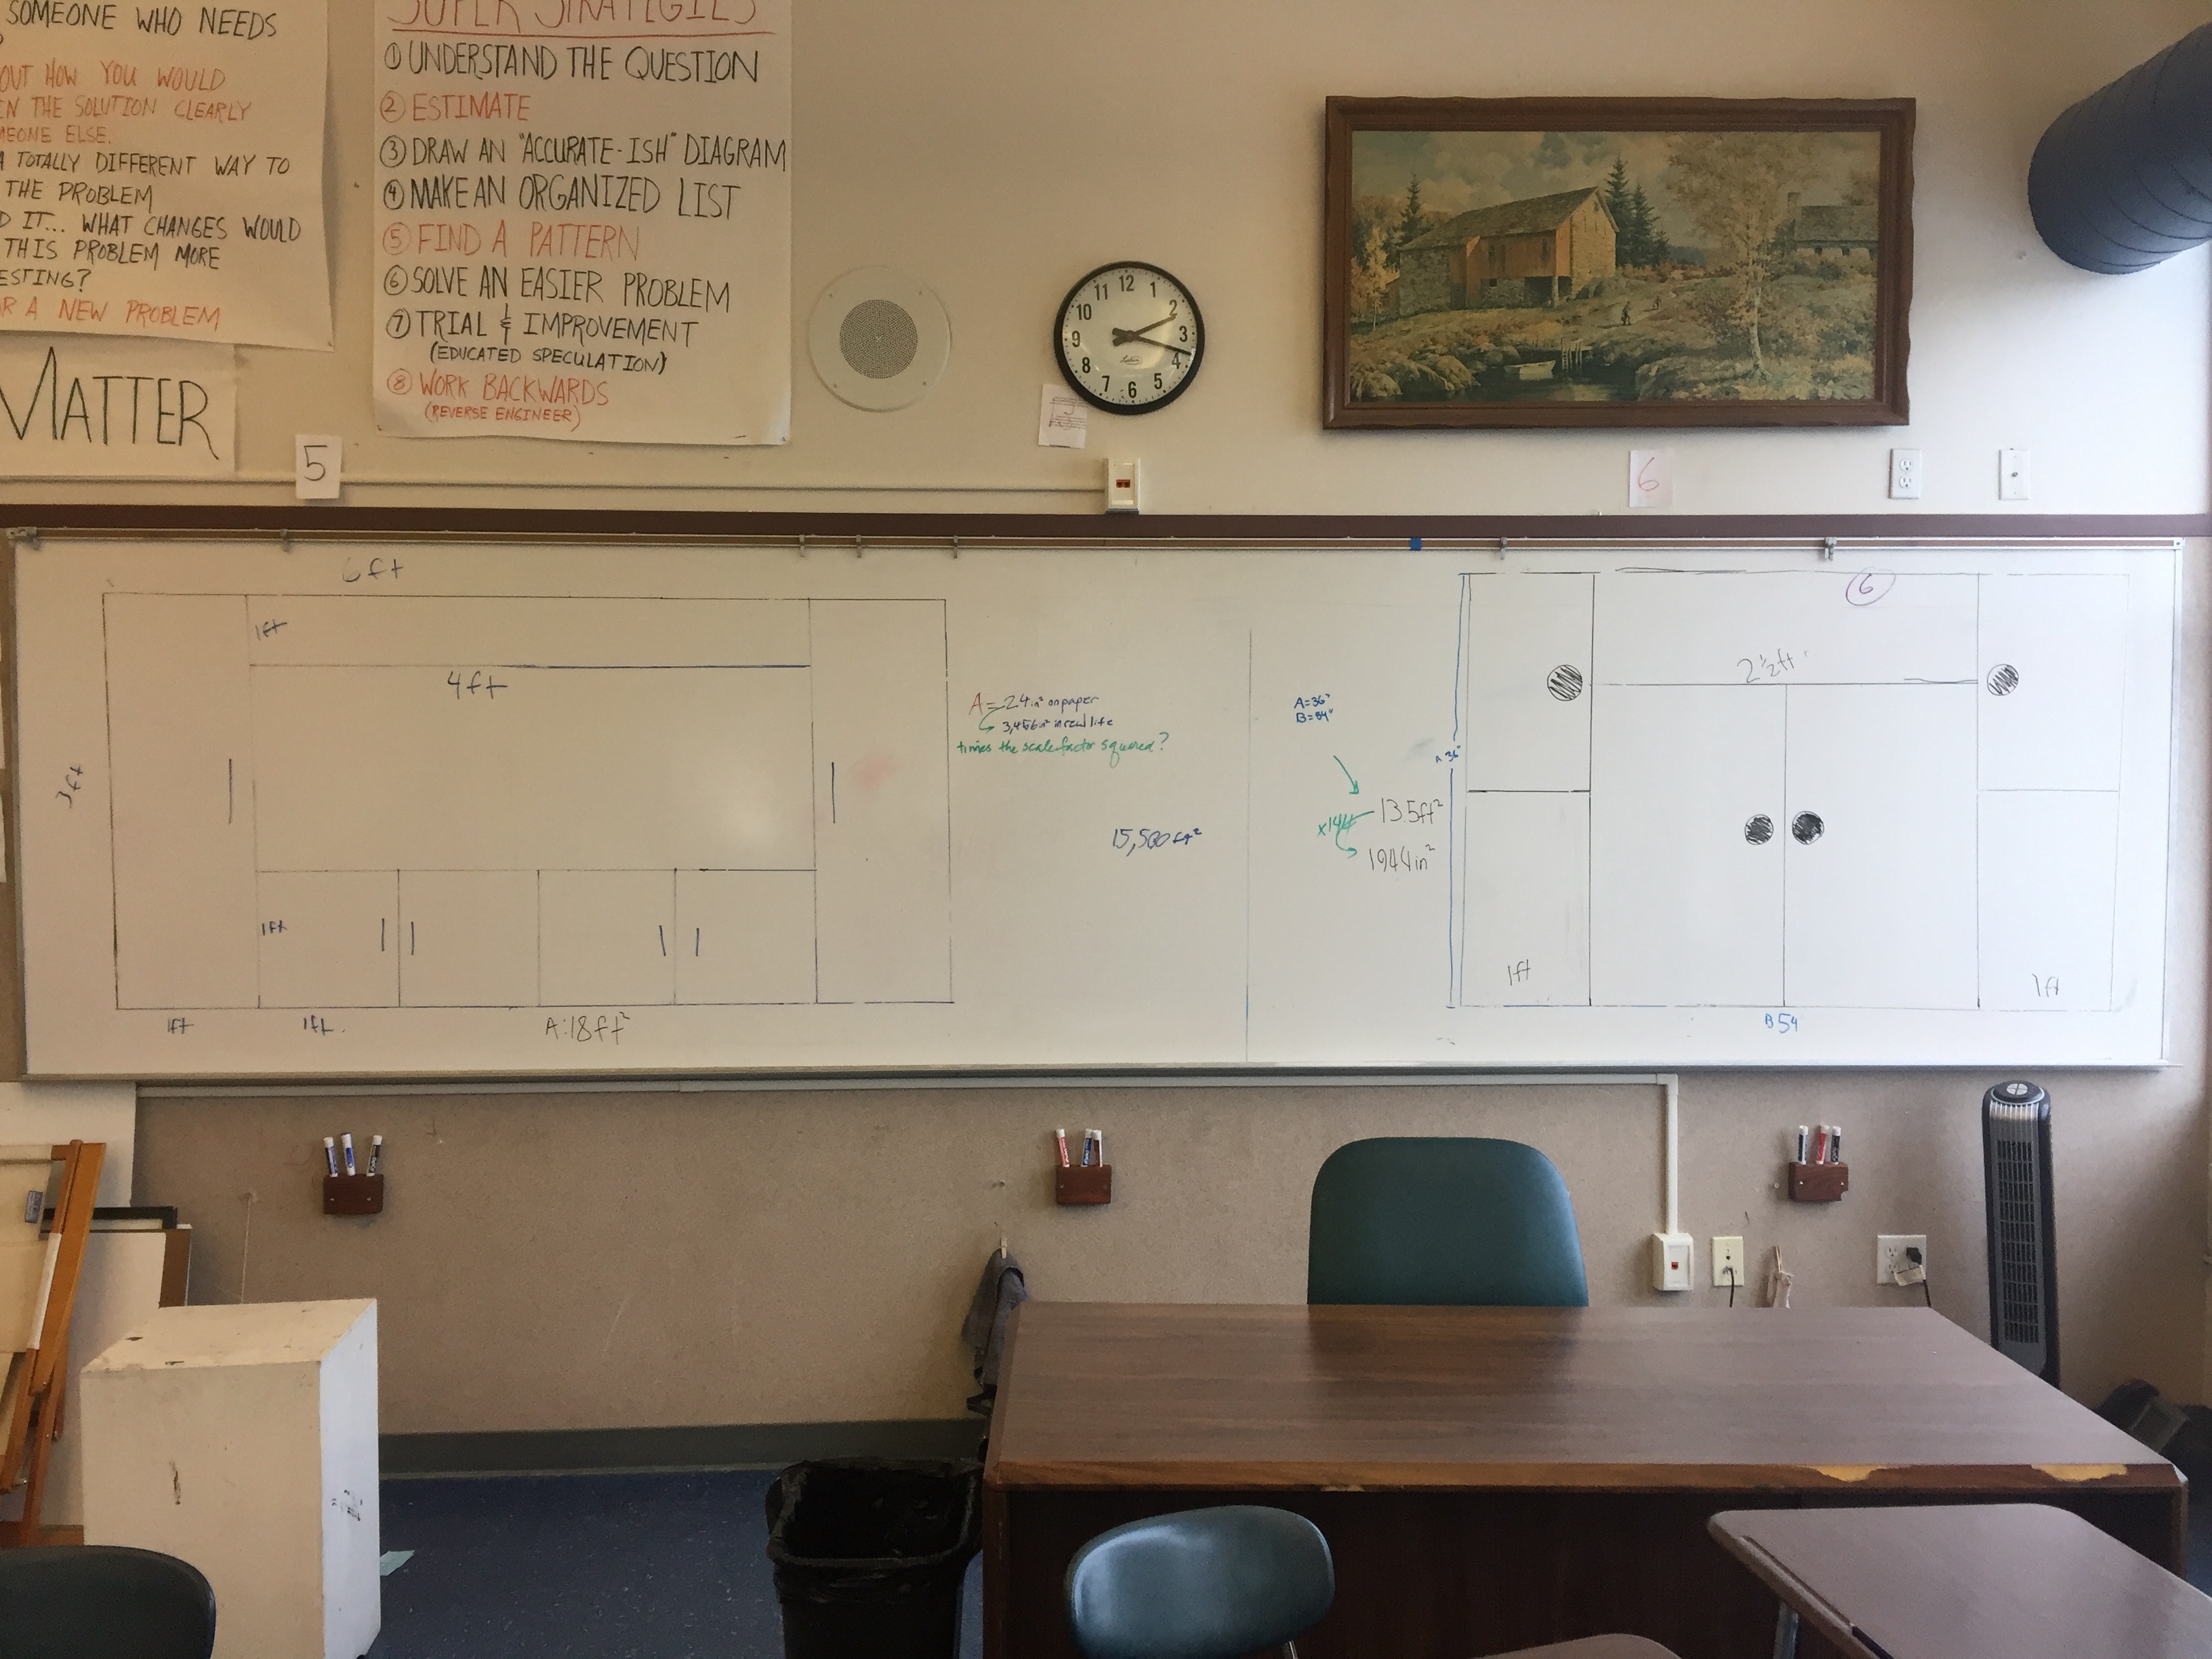
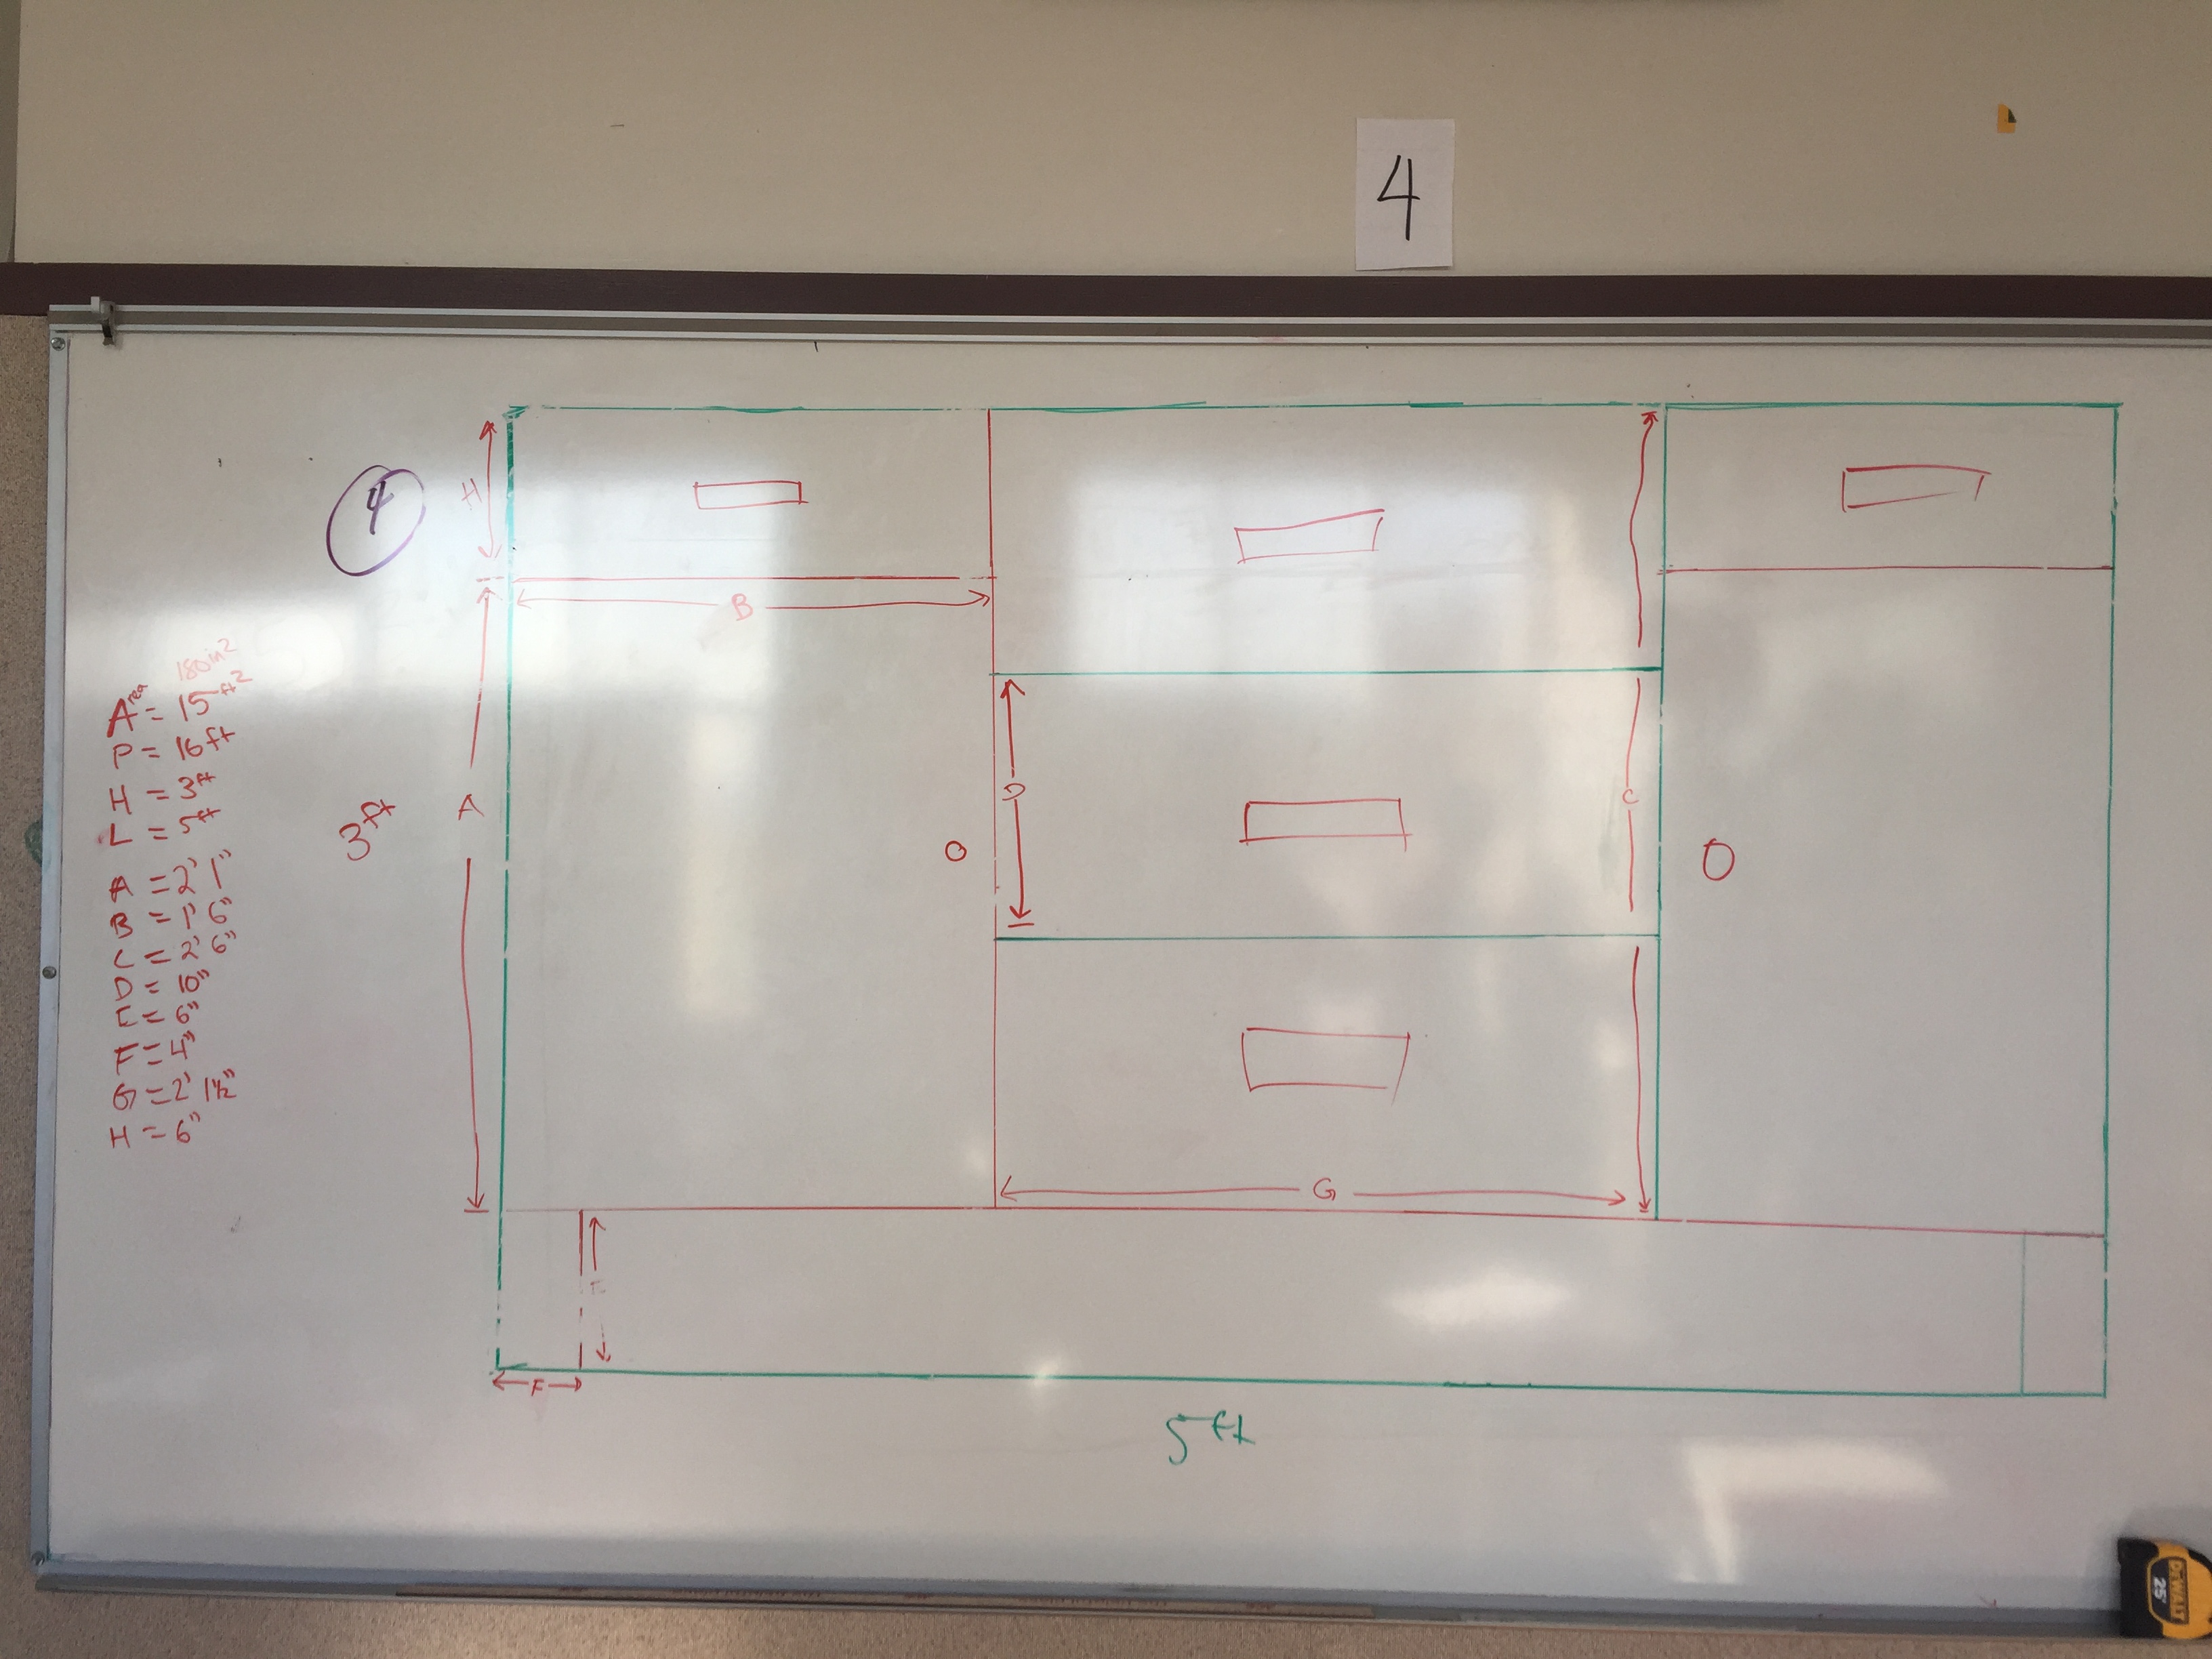
1. Draw a primary rectangle on the board that will represent the desired size of the sideboard. It should be actual size – they are usually 30″ to 36″ tall.

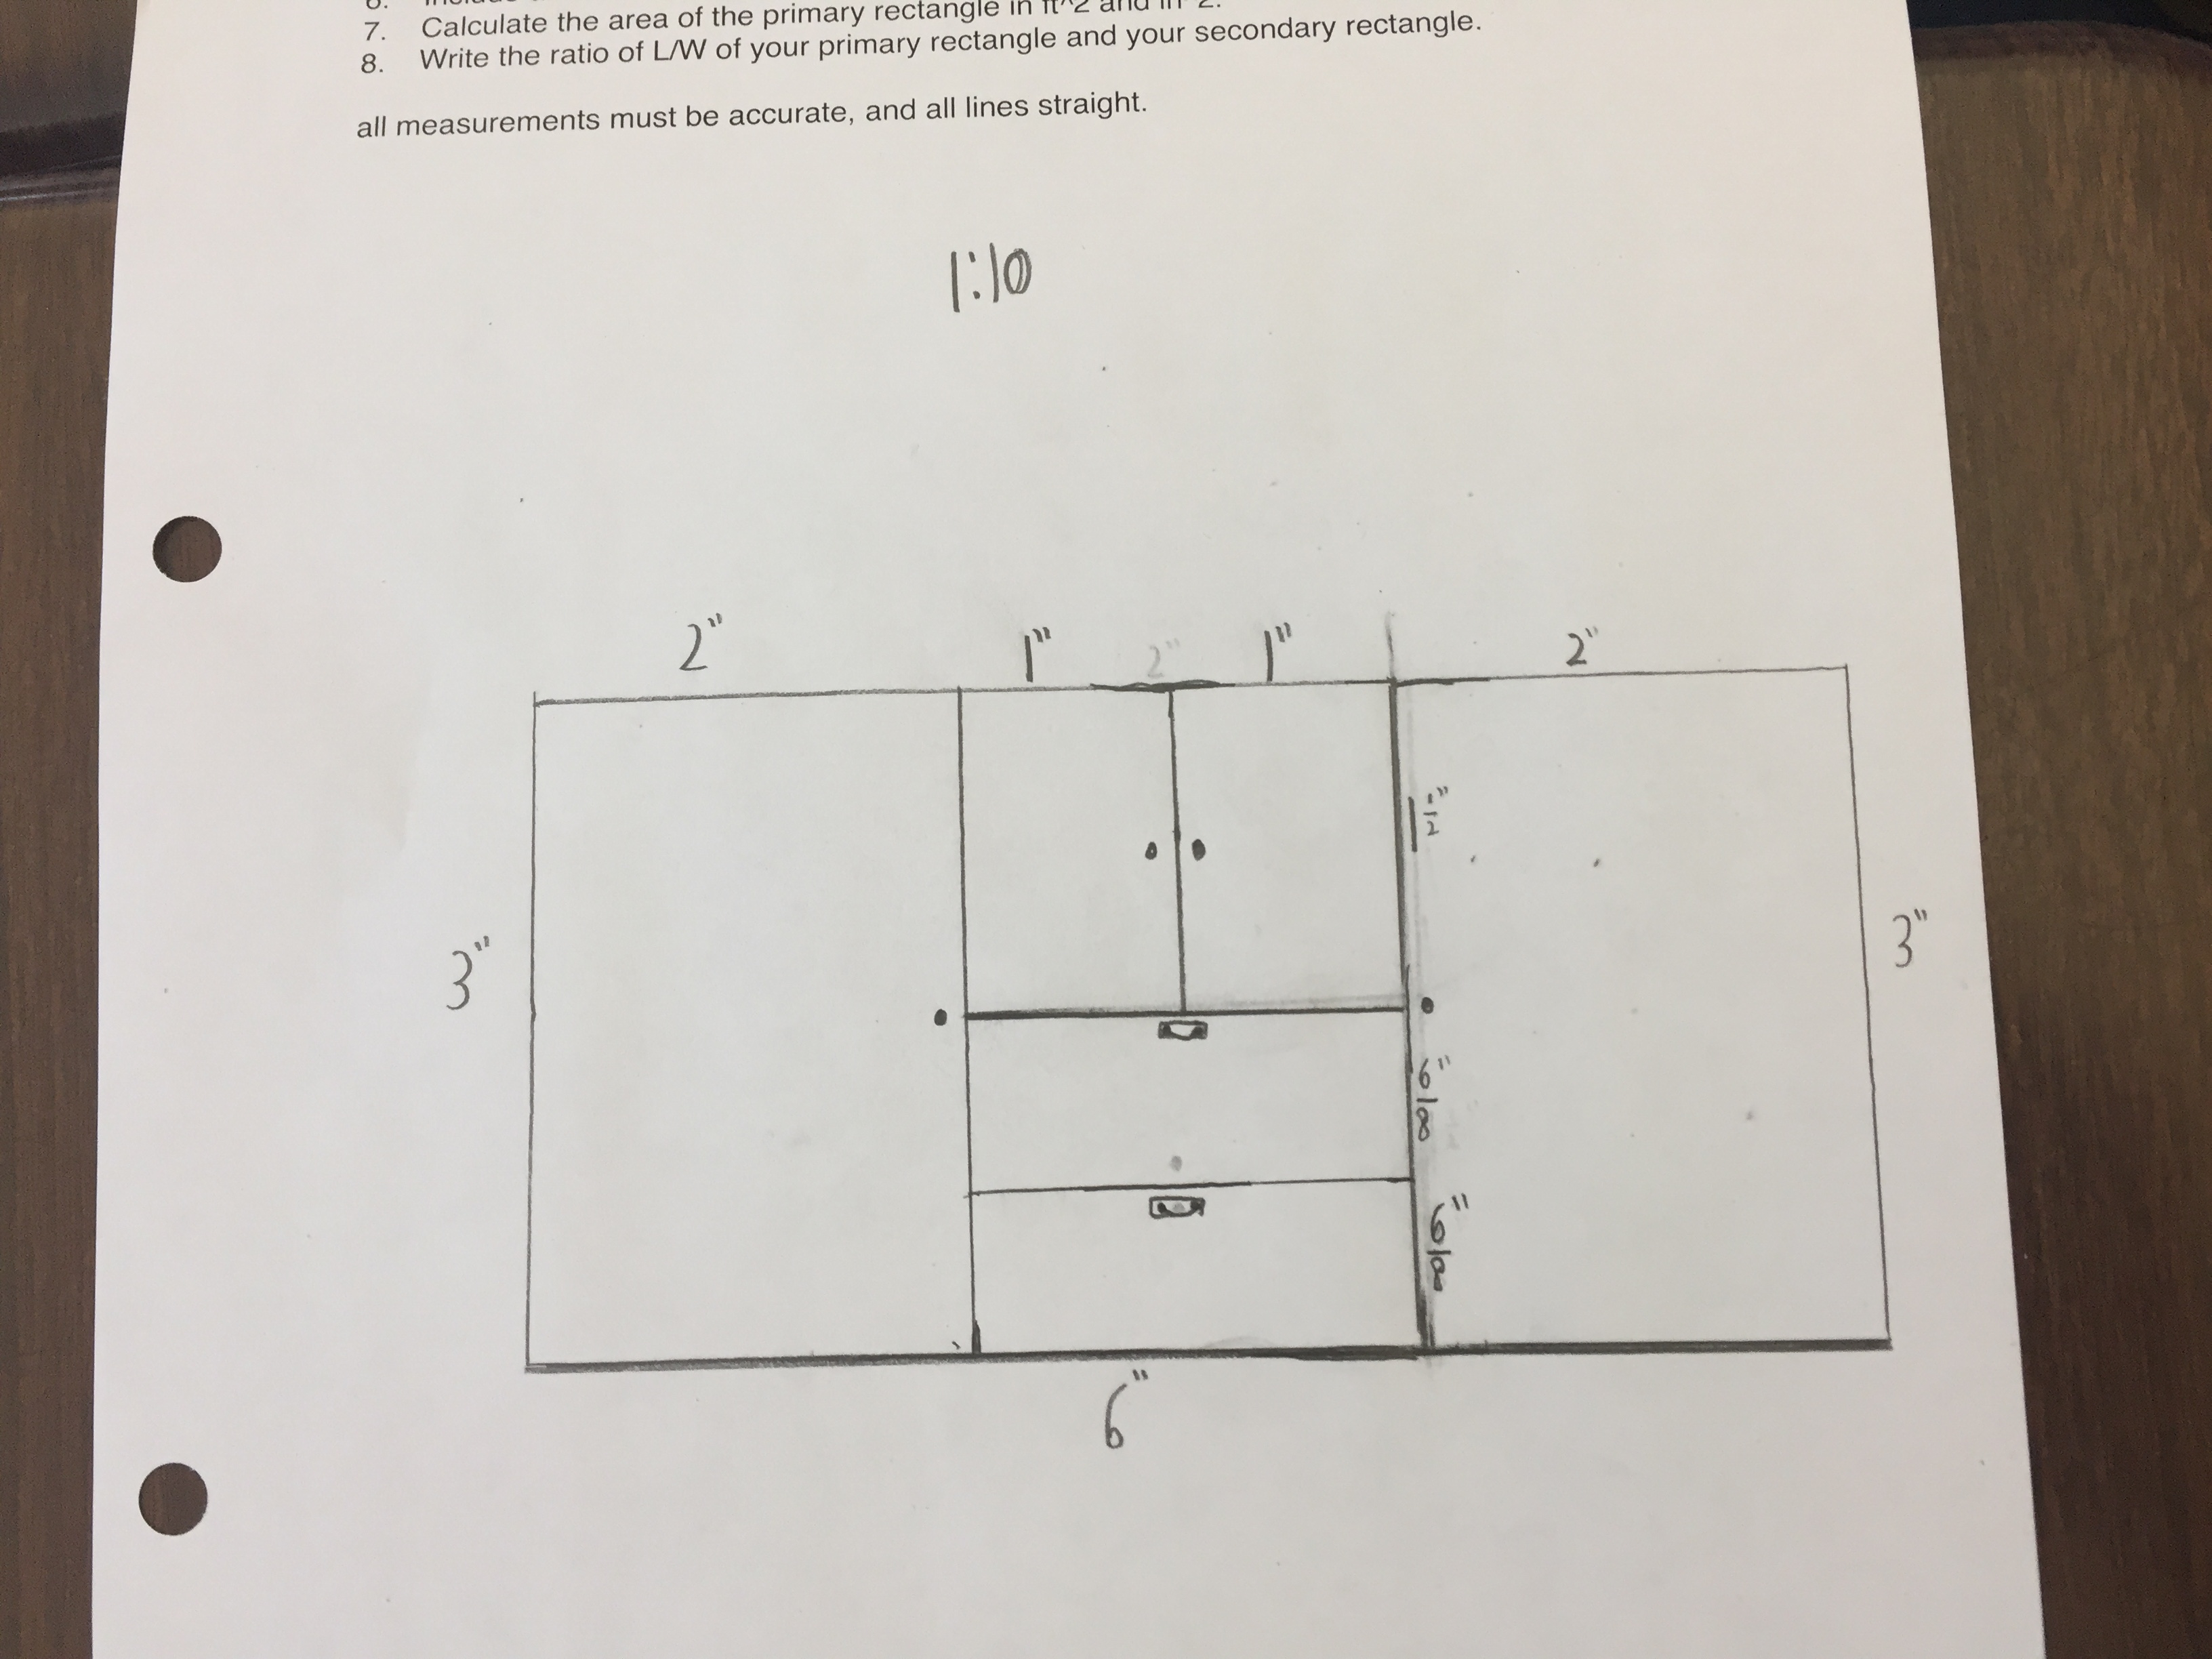
2. Scale down that rectangle to fit on a piece of paper using a scale factor they create.
3. Design a sideboard on paper and measure all relevant dimensions.
4. Scale the design back up to it’s actual dimensions and fit it into the original primary rectangle.
The Workflow:
I had them in groups of 2 and 3. Everyone in the group starts with the same primary rectangle. They choose a scale factor and scale it down. Now each member of the groups designs their own sideboard. They measure the necessary dimensions and then scale them up to what they should be in real life.
Once each group member had a design and knew what the scaled up dimensions were going to be, the group choose which design they were going to actually draw full size.
Once students were finished with the design I asked them to calculate the area of the primary rectangle in ft^2 and in^2.
In Retrospect:
Some students designed in only integer dimensions. I would require one of the dimensions in the design be a non-integer value.
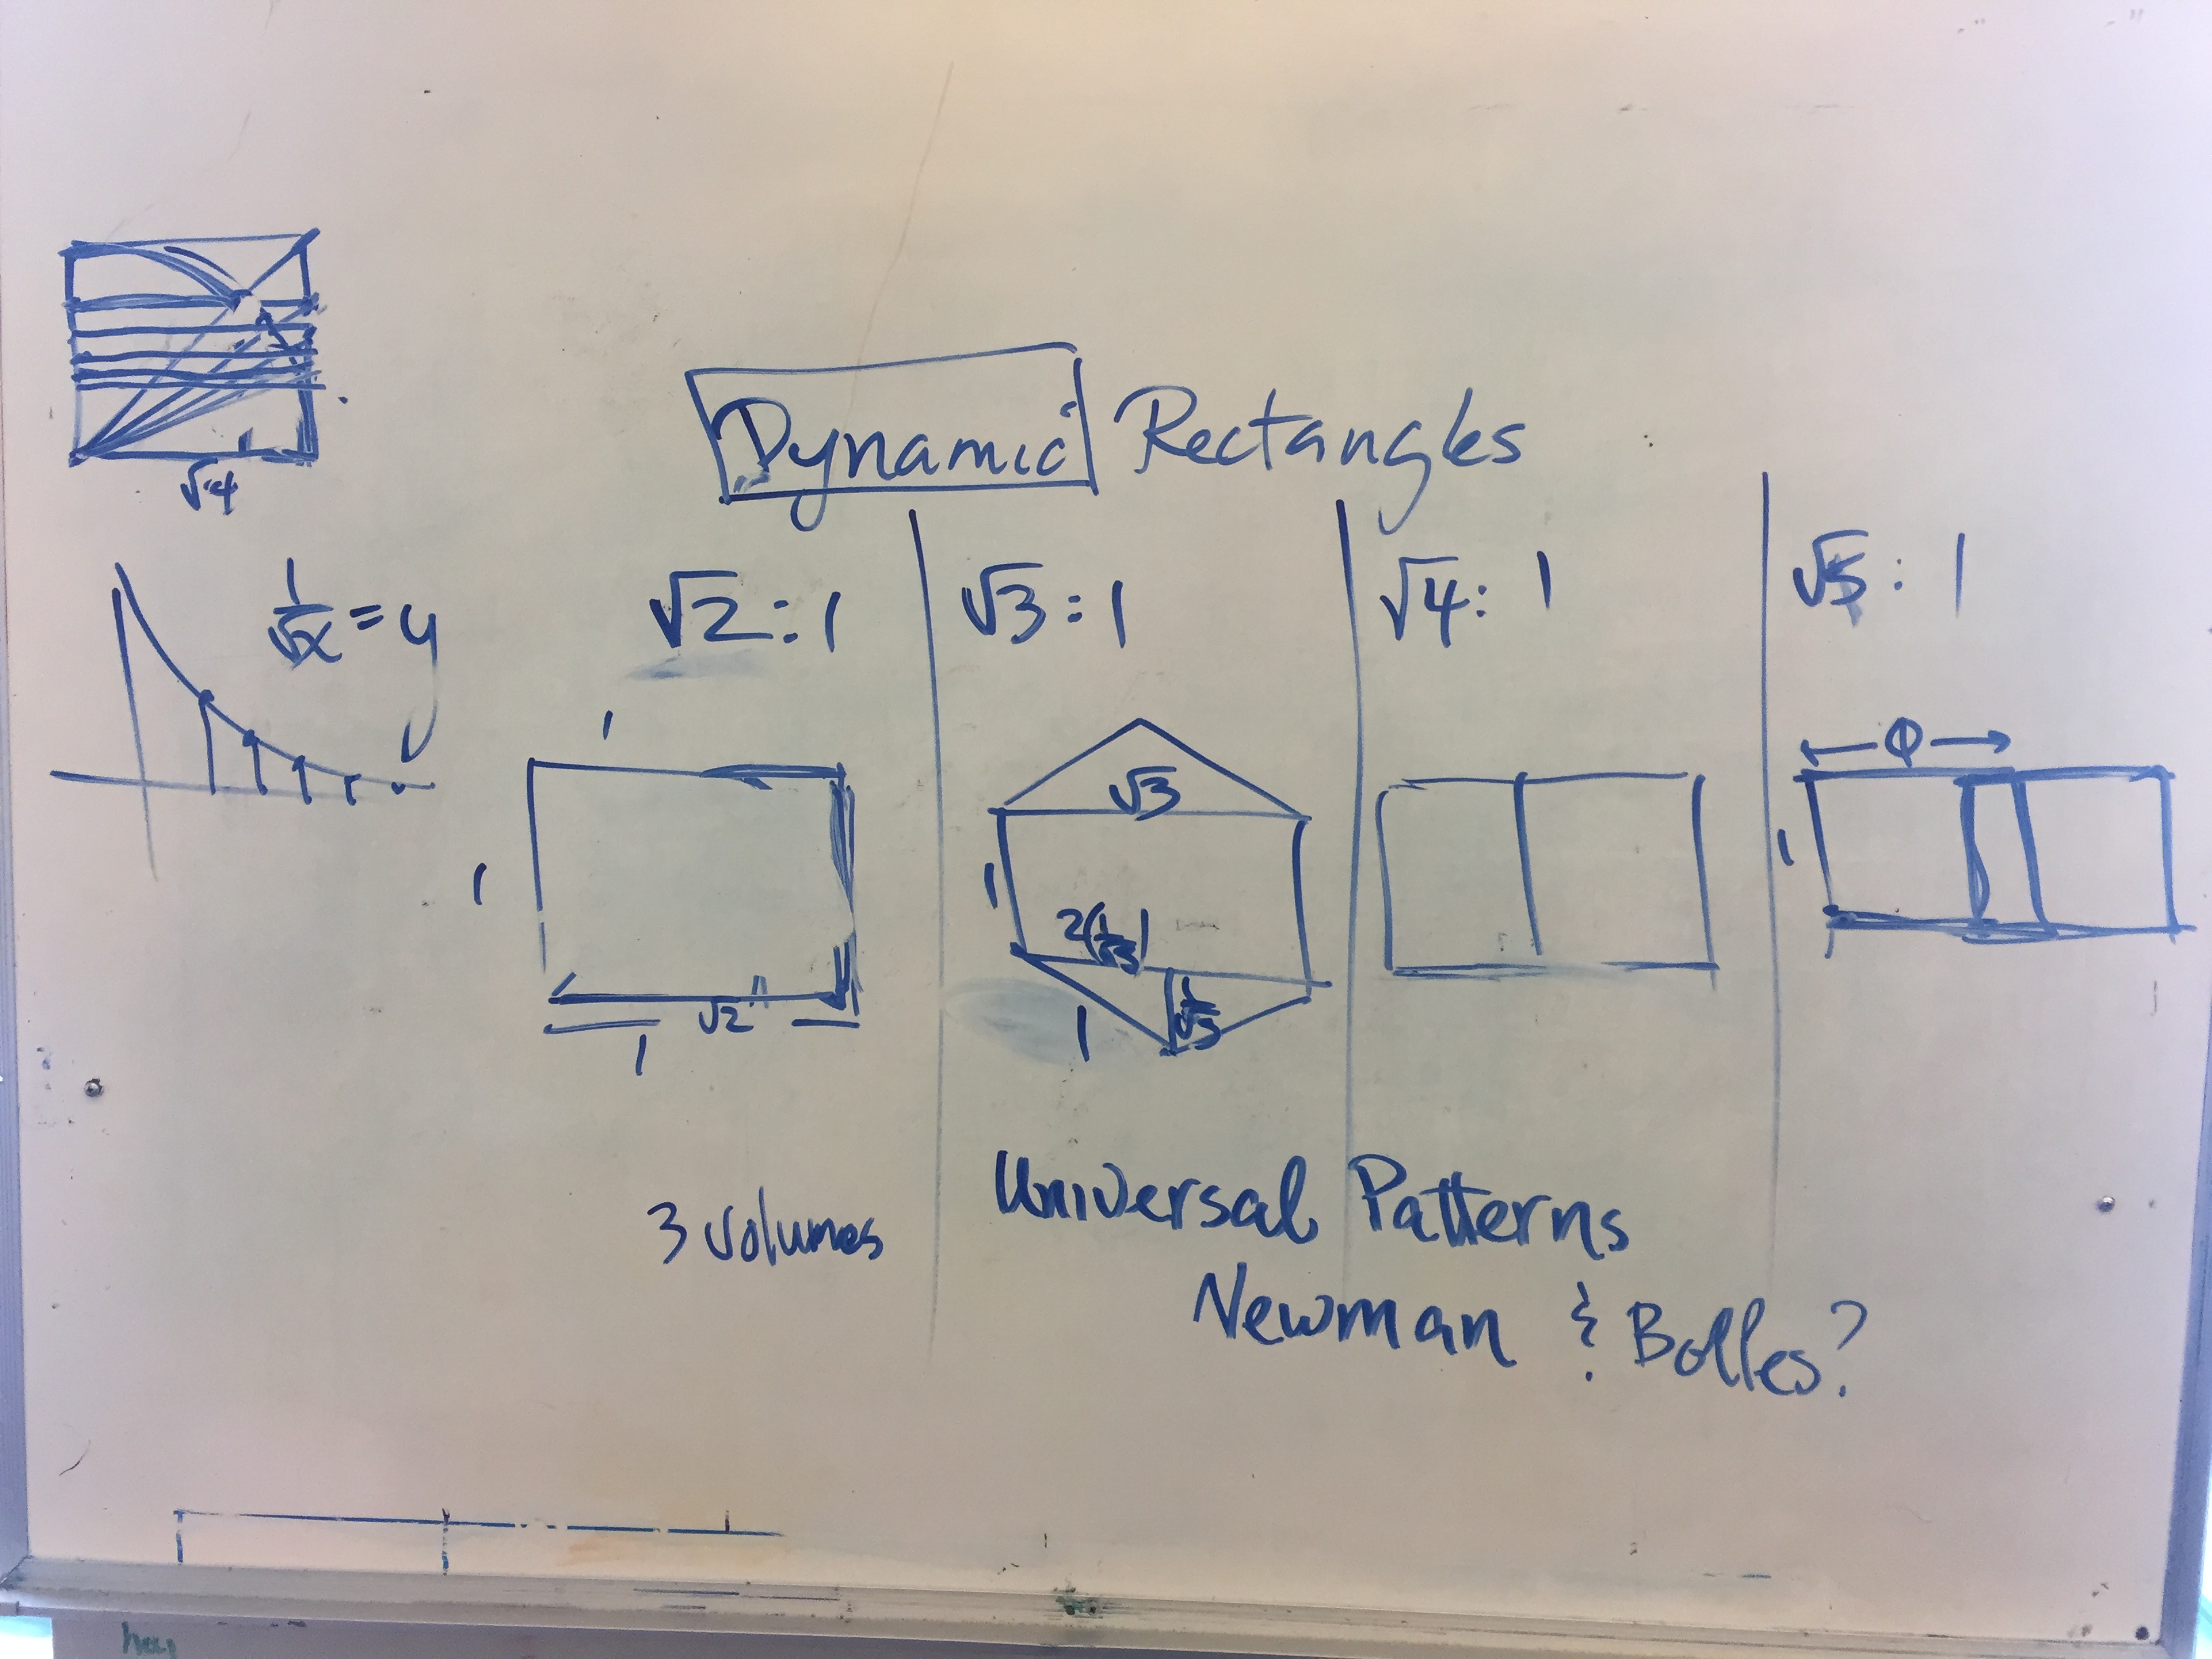
Only two groups ended up actually using a primary rectangle that didn’t have integer values. Next year I think it would be cool to do this activity again but require them to use one of the dynamic rectangles as the primary rectangle.
Also they would make design decisions based on aesthetic reasons, rather than making decisions based on the simplicity of the measurements.
Students could also look up sideboards online and to get design ideas.
Two Sneaky Reasons Why It’s Great:
1: Beginning with the primary rectangle offers an aha moment when they scale their design up and it fits perfectly inside the original rectangle. If they just scaled their design up based on a scale factor they would say – “yeah, well this looks right”. But since their rectangle is already on the board, the fact that the design fits right into is feedback that they scaled it correctly.
2: Kind of similar to above but they get to see the actual area. So when I ask them to find the area of the primary rectangle and they calculate 15ft^2, they can look at it and say “yeah, that’s actually what 15ft^2 looks like”. I mean how often do they calculate an area and never experience the actual size of the thing they are calculating [answer: too often].
Teaching Moments:
One of my favorite was when students began drawing their rectangles on paper and I got to ask them “What’s your scale factor?” and listen to them justify their selection. Not each group went with 1″:12″, because it made their drawing too small. A lot of groups went with 1″:6″, and some of those groups communicated that as 2″: 1′.
Supplies:
Meter sticks, rulers, and tape measures are great. Also if you have whiteboards loose they can also be used as a straight edge.
Scaffolding:
I did the following two assignments the day before. I had also done a vase design that began with a primary rectangle, so they had experience.
More Student Work:

For The Absent Kids:
I got you covered! Here’s a version of the activity that doesn’t need whiteboards. This worksheet was the inspiration to this lesson and it was given to me by Dave Casey. When I received it I thought to myself, “how can I make this great for a vnps classroom?” I love editing existing lessons rather that creating them from scratch.
66CW MU Activity sideboard design
Cheers!